Overview
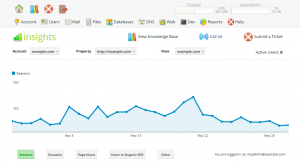
Hosting platforms v5+ support easy integration of Google Analytics into your Dashboard. Analytics provide a bevvy of useful metrics including unique visitor count, visitor behavior, SEO efficacy, goal targeting, and browser usage.
Enabling Analytics
Analytics requires setup within Google Code and the control panel.
Prerequisite: Google Analytics must be setup before completing this. See KB: Enabling Google Analytics support.
Configuring within Google Code
- Login to Google Code API Console using your Google account.
- Go to APIs & Auth > Credentials to create a new OAuth Client ID.
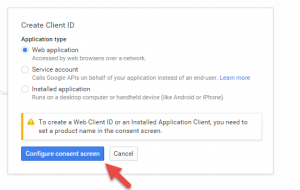
- Click on Create new Client ID to generate a new API ID. This will be used in the control panel to access Analytics.
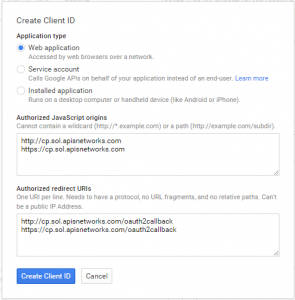
- Select Application type > Web application
- Under Authorized JavaScript origins, enter the suggested origin under Account > Settings. If no API key has been submitted yet, this value will appear. If an API key is present, delete it to view the suggested origin.
- Use the secure variant, https://, unless you are connecting to the panel over http://
- Click Create ID
- This is a sample input generated from a server, your Authorized JavaScript origins and Authorized redirect URIs will differ if on a different server.
- Copy the Client ID value generated. This will be used later under Configuring within the control panel.
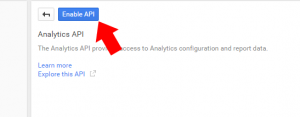
- Authorize control panel access to the Analytics API via APIs & Auth > APIs. Under API Library, search for “Analytics API“.
- Select Analytics API.
- Click on Enable API if it is not enabled on your account.
Configuring within the control panel
- Visit Account > Settings. Under Control Panel enter the Client ID generated in the above section into Google Analytics API Key.
- Click Save Changes
- Visit Web > .htaccess Manager (note: this can also be done via the htaccess directive ModPagespeedAnalyticsID)
- Click the Edit action to edit the domain or subdomain to add integration.
- Click Add Directive to expand the directive dialog.
- Under Personality select
Pagespeed- Configure PageSpeed to use your Analytics ID:
- For Directive, select
ModPagespeedAnalyticsID - For Value enter your Analytics ID created in KB: Enabling Google Analytics support
- Click Add
- For Directive, select
- Configure PageSpeed to inject reporting JavaScript into your web pages:
- Enable inline Analytics injection now by changing Directive from
ModPageSpeedAnalyticsIDtoModPageSpeedEnableFilters - Change Value from your Analytics ID previously entered to
insert_ga - Click Add
- Enable inline Analytics injection now by changing Directive from
- Save Changes to save your new .htaccess file
- Configure PageSpeed to use your Analytics ID:
- Go back to Account > Dashboard. Click Access Google Analytics button to authenticate.
- Important: if you receive an “Error: origin_mismatch” message, then you have incorrectly entered the Authorized JavaScript origins. Return to the previous section to correct. Origin changes may take up to 15 minutes to propagate.
- Refresh the page. Statistics will load.
- If statistics fail to load, ensure Analytics API has been enabled (see previous section).
Disabling Analytics
Visit Account > Settings > Control Panel section > Google Analytics API Key > Delete to remove API key access. This will also disable integrated Analytics.
Limitations
Analytics only works on well-formed HTML pages. Raw files are never reflected in byte usage. For example, linking to a file directly, such as the 100 MB test file, is never reflected in usage (click as much as you’d like! it is not reflected in Google Analytics usage). However, loading an image, such as the logo or control panel sample image on lithiumpanel.com, inline as part of a web page is reflected. This discrepancy occurs because Analytics must include itself in valid HTML. Sending a raw file precludes bootstrapping by lack of a HTML document.


